Cold Processed Soap: Freshly cut Neem soap

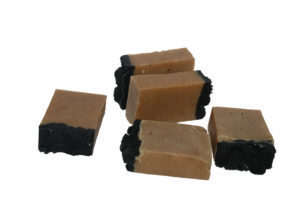
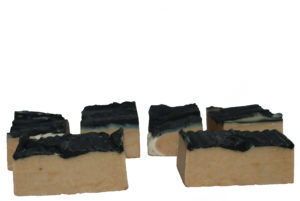
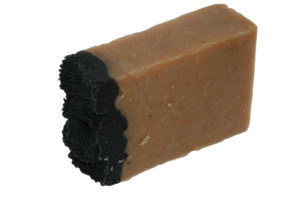
Yesterday, I cut my Neem soap. All I can say is wow, was it pungent when I cut that soap! The scent hit me like… whoa! It had a strong earthy, sock smelly stank scent. I’ve used Neem oil for several years, it smells like garlic so I was prepared for that. I let my daughter take a whiff of the soap logs and she instantly backed away and said, “Oh, that smells bad!” A few hours later I gave one of the bars another sniff test and noticed that the smell had dissipated significantly.

From my research, the reviews are mixed about whether the scent of neem will still shine through with the completed bar, we’ll see if the smell returns once the soap bar is wet.


Even though this soap gave me fits because it traced so quickly, I must say that I’m really loving how this soap feels. It has a smooth and creamy texture. I can’t wait to try it out with water to see if that feeling lasts once it’s wet. I really enjoyed creating this soap and I’ll be sure to document what pops out at me once it cures.

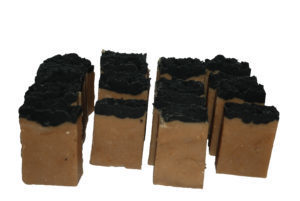
I now have 18, five-ounce bars of Neem soap.


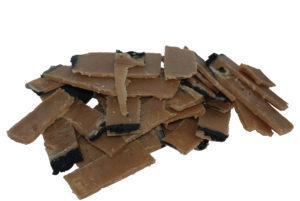
With this soap, I did shave off the ends, which means I’ll be able to add bits of it to other cold processed soaps.

Continue Reading

Cold Processed Soap – Neem Soap

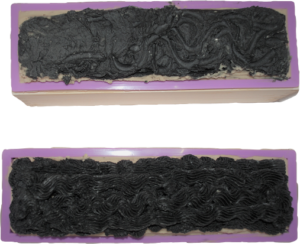
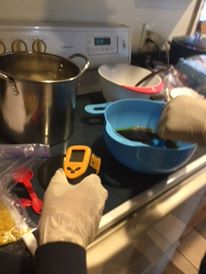
I’m happy to say that I did get to make my sample soaps today. Early last week, I purchased two new wooden soap molds with silicone liners, those molds were just enough for my soap batter.  A little after 10: 30 am, I made the lye solution and allowed it to cool outside. Late this afternoon, I melted the oils and took those outside to cool. While the oils were outside cooling, I brought the lye solution inside and transferred the contents to two mason jars. A little over an hour later, I decided to combine the lye with the cooled oil. I will say that this recipe set up very quickly. Yikes! I’m not exaggerating when I say that the soap batter started to trace within seconds after I added the lye solution to my oils. By the time that I was pouring the batter, I had to use a spoon to plop it into the molds since it was too firm to pour. This is a first since I’ve always been able to pour the batter into the molds without any issues. Well… there’s a first time for everything, right? Because my soap batter set up so quickly, this meant I really didn’t have a chance to make the fancy designs that I wanted. Sighs… but I still tried.

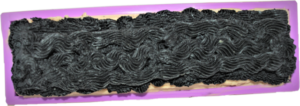
I used a pastry bag (and an attachment tip) to create a simple design, but… I was only able to get a design on one soap mold, and the design wasn’t all that great since it wasn’t all that malleable.

By the time I was in the second mold, I used a spoon to add the ‘black frosting’ to the remaining soap mold. It’s not pretty, but I was able to get it complete. If it bothers me too much, I’ll simply rebatch the soap within the next few days. For those who don’t know, neem smells like garlic. After I’d placed the soap batter into the molds, I could faintly smell the garlic. I’m wondering if the smell will dissipate over time? We’ll see.

I have used neem oil in a variety of skin care products and also to make cold processed soap before, however, this is the first time that I used such a large amount in my soap. Neem oil is an excellent source of essential fatty acids, triglycerides, calcium and vitamin E. It’s also antifungal and is supposedly great to use for mature skin since it can help reduce the effect of aging, such as wrinkles. I’m curious to see how it works within a soap bar.

I do keep a soap journal and document my new soaps as well as amending old recipes. I’ll be sure to log the experiences with this new soap recipe that I’ve created.

Continue Reading

No Thanksgiving soapmaking and two new soap molds

Earlier this week, I had been looking forward to making cold processed soap on Thanksgiving day. It’s been a busy few weeks for myself, and I looked at that day as my first day of rest and a chance to do something for “me,” however, things didn’t go according to plan. Guess what? Thanksgiving morning, I was still completing a few reports for my work as an independent contractor. Originally, I’d  planned to have the reports completed the day before, but…  a slow computer put a stop to that. Initially, I didn’t know if the problem was on my end, or… the site where I was submitting the work, however, a few hours later, I discovered my computer was the culprit. Allowing, Windows 10 to install updates fixed the issue.

Thanksgiving day, I did take breaks throughout the morning to hang with my daughter and I also prepared a stir fry for her. That was her choice, we rarely eat the traditional Thanksgiving meal. But… by the time I have finished my reporting, on Thanksgiving day, the only thing I wanted to do was hang with my daughter and rest, and that’s exactly what I did. It looks that I finally will get the chance to make soap tomorrow afternoon, which will be exactly two weeks after showing a friend how to make cold-processed soap.
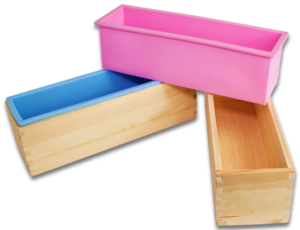
Tomorrow, I’ll be using two brand-new soap molds with silicone liners. Earlier this week, I’d purchased the molds. They make around two-pound batches per mold. I’m looking forward to using them in some of my smaller batch ‘sample’ recipes. I have at least one sample soap that I’d like to try tomorrow and I’ll be sure to use one of those molds. I’m still unsure if I’m ‘sold’ on these molds. They definitely are cheaply made compared to my other handcrated wooden soap molds and while my other soap molds cost a bit more, I do believe I’ll stick with those when it comes to purchasing more molds, or… make them myself. I’ll be sure to purchase the molds in plenty of time, so I’m not needing them ASAP, which is why I ordered the above and since I purchased them on Amazon (and am an Amazon Prime member) I received them the same day that they were purchased. With my custom molds, the delivery time typically takes a bit longer since they are usually made after purchase and I’m fine with that.

Currently, I’m researching Aleppo soap (100% olive oil) and pine tar soap. While both soaps have been around for years, Aleppo soap easily trounces pine tar soap with its long history dating back over two thousand years. I won’t be making either of those soaps tomorrow. Both soaps are reportedly excellent for general dermatitis like eczema, psoriasis, bacterial dermatitis, acne, herpes, rosacea, and a few other skin conditions and while these really haven’t affected me, I’m still curious and will test a few recipes for both soaps and give them out as samples to a few acquaintances who do suffer from these issues. An interesting fact is that soaps were mainly created for the cloth industry to prepare wool for dyeing and not for personal hygiene.


Resources:

The History of Soapmaking
Continue Reading

Cold Processed Soap: Keeping it simple

Last weekend,


I invited a friend over to the house and showed them how to make cold processed soap. They left my home with two silicone soap molds full of raw soap and… my first soap cutter! Now if they want to continue making soap, they have two soap molds and a soap cutter. I did have another soap mold on hand in case those two molds couldn’t hold all of the soap batter and I was able to fill my smallest soap mold to the halfway mark. It gave me six bars of soap.

The soap was ready to release from its mold in less than 24 hours. This soap did have some soap ash on it and I might remove it at some point, but most likely not since these will be kept at home. Within the next few days, I’ll be making a large batch of cold processed soap. My 14-year-old daughter will be helping me create this soap. I’m still unsure of what ingredients will go into the soap, but I do know that at least two of the ingredients will have coconut oil and castor oil.

When it comes to soapmaking, typically the list of ingredients that I use for each soap recipe is small. I find that even with such a small list, that the soap usually does what it’s supposed to do. It cleans, conditions some have more bubbles/lather than others, but that’s by choice. For myself, knowing what each ingredient does and how they work well together is much better than trying a variety of ingredients that I’m unsure of how they’ll work when combined with each other. Typically, I let my soap cure for at least two months before I give it to others. Recently, the cure time has been much longer. I think it’s been about four months for the last large batch of soap that I’ve made, and I must say that I’m really enjoying the longer cure time since it’s given me a much harder and drier bar of soap.


Continue Reading