Happy New Years and soaping later this week…

You know something? I haven’t made any cold processed soap since Christmas day. Today, I did restock my father’s body butter. He tells me it does a better job on his skin than his store bought lotion. Folks, that is high praise coming from my father. He’s not one to go overboard in stating why he likes a product. I just make sure I keep his body butter fully stocked.

And although (in the last few weeks) I haven’t been making soaps, butters or any other skin related items, I have been doing some behind the scenes work that does involve skin care. A few more ingredients have arrived in the mail as well as an updated appliance and… I’m making sure I have all my ‘ducks in a row’ regarding the business aspect before I officially launch my product line. Tomorrow, I’ll be updating my whiteboard calendar with some of my business goals and I already added a few items to my Franklin Covey planners. I use the Classic and the Monarch. I’ve found writing down my goals holds me accountable and keeps me on target.

I still need to write about the fabulous pine tar soap that I made last month and also about the transition to purchasing my ingredients in bulk, and… making my own collapsible wooden soap molds, but… those will be posts for another day.

Tonight, I’m enjoying New Year’s day with my daughter and my brother and nephew stopped by to hang out with us until tomorrow. My sister in law didn’t make it this visit. Here’s hoping that you all had a great 2017 and a fabulous 2018!

Continue Reading

Cold processed beer soap: Here’s the cut

Well, I must say that I’m loving the look of my cold processed beer soap. Isn’t it pretty? No fancy designs, but I’m thrilled with its appearance. This is the soap that I made on Christmas day and it made 17 bars of soap. I still need to weigh the soap, but I’m thinking it’s about four ounces per soap bar.

Yesterday, I tested a tiny slice of the soap under running water and my goodness does it have some rich lather. I cannot wait for this soap to cure.

Although it’s a beer soap, it doesn’t smell like beer at all. Currently, it does have a faint smell, but I can’t place the scent. My daughter sniffed a soap sample and thinks it smells like cherries. Unscented soap is my favorite type of soap that I use for myself, however, I also make scented soaps using essential oils.

This was my first time creating beer soap, and I’ll be sure to make it again soon. Oh, I can’t wait for this soap to cure. But, I said that already. Do you want to know something? With each new soap that I make, I set aside a bar and place it on my nightstand so I can sniff. I know I know… crazy! But… I love the smell of artisan soap. Especially unscented soap, it has it’s own “clean scent.”

Continue Reading

Christmas and cold processed beer soap

Today is Christmas, in our home we don’t really get into the holiday that much, but we do enjoy spending time together. I made one of my daughter’s favorite dishes; dhal, stir fry veggies and… chapati and I made soap! It’s been a few weeks since I’ve made soap, so I was really excited about preparing this soap loaf. During my “time off” of soapmaking I have made body butters and lip balms. I’ll have to write and post pictures of what I created.


A few days ago, I poured three bottles of Guinness draught stout in a Mason jar

and set it aside so it could go flat. Well… after 1.5 days it still wasn’t flat! There was still plenty of carbonation in the beer. I’ve read many reports not to use the beer that hasn’t gone flat because it could cause an explosion when lye is added to the mix. Hmm, since I didn’t want to wait any longer and, I felt that I could live with an eruption (if handled carefully) this morning, I went on and divided the beer into ziplock baggies and placed into my freezer and let it stay there until it becomes solid. Afterwards, I placed the frozen beer into my soap mixing bowl and slooowwllly added the lye. Guess what? No volcano! Of course, this doesn’t mean I can do this with every beer and… even though the soap wasn’t flat, I imagine it wasn’t as fresh as a newly cracked open beer.

Late this morning, I combined all my oils (liquid and solids)  in a large stockpot and turned the burner on low to melt the solid oils. Thie evening, I finally got around to combining the ingredients together and making my beer soap. Because the oils had set several hours their temperature was about 91F and the lye water, after the lye had dissolved into the beer, was 81F. I used one of my favorite recipes and simply tweaked it with the addition of beer and egg yolk.

I’m eager to sample this soap once it cures. Since I’m working on a much-loved recipe, I can only imagine that the addition of the beer and egg yolk will simply enhance the soap. From my research, the addition of beer produces a rich lather. We’ll see, most of my soapmaking recipes already do that and so I’m curious to see if there are any noticeable changes. The addition of egg yolk supposedly adds a creamy texture, again something I do see in some of my soaps but adding these ingredients might mean I can use them in place of others when I’m experimenting with new recipes. I can’t wait to cut this soap. Hopefully, it’ll be ready tomorrow.

A fun test will be to try this again with freshly frozen beer to see what happens. No, I wouldn’t recommend this to anyone to do, but I’ll definitely try it out. I’ll make sure I do my mixing outside.

Wishing those who celebrate it, a very Merry Christmas!

Continue Reading

Soapmaking: Purchasing a few items…

I’ve been eyeing a drying rack for quite some time and I’m finally going to make the purchase.

With the amount of soap that I’ve been making to have a dedicated rack for soapmaking, right? This is the one that I’ll be purchasing. No… I STILL haven’t made the purchase. I’m unsure why I’m still so hesitant. I dislike spending money, but the purchase is justifiable, so…

Also, I’ve decided to upgrade my stick blender. The one that I’ve been using has serviced me well for over fourteen years, however, I’m starting to get nervous about it and to be honest, I’ve been wanting to have a stick blender that detaches and… I’ve always wanted to have a backup blender, and so… I finally made a purchase. It’s not my ‘dream stick blender’, but if things get moving, I’ll think about upgrading to the one that’s on my Amazon wish list. Detachable stick blenders do make clean-up so much easier. I have one that I use for cooking (no, I don’t use it for soapmaking) and so I’ve purchased this blender. It should be arriving a few days after Christmas. Which is just too bad, since I won’t be able to use it when I make soap tomorrow. I’m thinking of making a beer soap and… I’m going to make a few valentine themed soaps. After all, it won’t be long before Valentines Day is here, right?

Continue Reading

Cold Processed Soap: Wine Soap

I’m on a roll with my cold processed soap. Yesterday, I finally got around to making my cold processed wine soap. The wine was purchased on Wednesday. I boiled 48 ounces of wine to remove the alcohol. Do you know, that about half evaporated when the wine boiled? Once the wine had cooled, I put in a ziplock bag and added to my freezer. This was my replacement for water. I typically freeze my liquids so when I add my lye to the liquid, it won’t get as hot. The added bonus is when I use something besides water (which is most of the time) I’m not scorching whatever liquid I choose.

And here’s how my soap looked yesterday, right after I poured it into its cedarwood mold. For the top, I added finely crushed hibiscus petals. I can’t say enough good things about this soap mold. The sides open which makes it extremely easy to release the soap from the mold once it’s set.


About five hours ago, I did remove the soap from my cedar mold. As you can see the design I added was layered and so it looks nothing like wine, but I don’t care. My daughter thinks it resembles a cake. This soap was still too soft and so it was placed back into its mold. Do you know that this is the first soap (in a long time) that will take over a day before it’s ready to be removed from the mold? Today is Friday, I most likely will check it on Sunday.

Continue Reading

Cold Processed Soap: Freshly cut Neem soap

Yesterday, I cut my Neem soap. All I can say is wow, was it pungent when I cut that soap! The scent hit me like… whoa! It had a strong earthy, sock smelly stank scent. I’ve used Neem oil for several years, it smells like garlic so I was prepared for that. I let my daughter take a whiff of the soap logs and she instantly backed away and said, “Oh, that smells bad!” A few hours later I gave one of the bars another sniff test and noticed that the smell had dissipated significantly.

From my research, the reviews are mixed about whether the scent of neem will still shine through with the completed bar, we’ll see if the smell returns once the soap bar is wet.


Even though this soap gave me fits because it traced so quickly, I must say that I’m really loving how this soap feels. It has a smooth and creamy texture. I can’t wait to try it out with water to see if that feeling lasts once it’s wet. I really enjoyed creating this soap and I’ll be sure to document what pops out at me once it cures.

I now have 18, five-ounce bars of Neem soap.


With this soap, I did shave off the ends, which means I’ll be able to add bits of it to other cold processed soaps.

Continue Reading

Cold Processed Soap – Neem Soap

I’m happy to say that I did get to make my sample soaps today. Early last week, I purchased two new wooden soap molds with silicone liners, those molds were just enough for my soap batter.  A little after 10: 30 am, I made the lye solution and allowed it to cool outside. Late this afternoon, I melted the oils and took those outside to cool. While the oils were outside cooling, I brought the lye solution inside and transferred the contents to two mason jars. A little over an hour later, I decided to combine the lye with the cooled oil. I will say that this recipe set up very quickly. Yikes! I’m not exaggerating when I say that the soap batter started to trace within seconds after I added the lye solution to my oils. By the time that I was pouring the batter, I had to use a spoon to plop it into the molds since it was too firm to pour. This is a first since I’ve always been able to pour the batter into the molds without any issues. Well… there’s a first time for everything, right? Because my soap batter set up so quickly, this meant I really didn’t have a chance to make the fancy designs that I wanted. Sighs… but I still tried.

I used a pastry bag (and an attachment tip) to create a simple design, but… I was only able to get a design on one soap mold, and the design wasn’t all that great since it wasn’t all that malleable.

By the time I was in the second mold, I used a spoon to add the ‘black frosting’ to the remaining soap mold. It’s not pretty, but I was able to get it complete. If it bothers me too much, I’ll simply rebatch the soap within the next few days. For those who don’t know, neem smells like garlic. After I’d placed the soap batter into the molds, I could faintly smell the garlic. I’m wondering if the smell will dissipate over time? We’ll see.

I have used neem oil in a variety of skin care products and also to make cold processed soap before, however, this is the first time that I used such a large amount in my soap. Neem oil is an excellent source of essential fatty acids, triglycerides, calcium and vitamin E. It’s also antifungal and is supposedly great to use for mature skin since it can help reduce the effect of aging, such as wrinkles. I’m curious to see how it works within a soap bar.

I do keep a soap journal and document my new soaps as well as amending old recipes. I’ll be sure to log the experiences with this new soap recipe that I’ve created.

Continue Reading

No Thanksgiving soapmaking and two new soap molds

Earlier this week, I had been looking forward to making cold processed soap on Thanksgiving day. It’s been a busy few weeks for myself, and I looked at that day as my first day of rest and a chance to do something for “me,” however, things didn’t go according to plan. Guess what? Thanksgiving morning, I was still completing a few reports for my work as an independent contractor. Originally, I’d  planned to have the reports completed the day before, but…  a slow computer put a stop to that. Initially, I didn’t know if the problem was on my end, or… the site where I was submitting the work, however, a few hours later, I discovered my computer was the culprit. Allowing, Windows 10 to install updates fixed the issue.

Thanksgiving day, I did take breaks throughout the morning to hang with my daughter and I also prepared a stir fry for her. That was her choice, we rarely eat the traditional Thanksgiving meal. But… by the time I have finished my reporting, on Thanksgiving day, the only thing I wanted to do was hang with my daughter and rest, and that’s exactly what I did. It looks that I finally will get the chance to make soap tomorrow afternoon, which will be exactly two weeks after showing a friend how to make cold-processed soap.

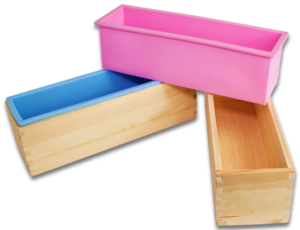
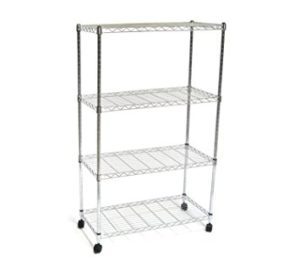
Tomorrow, I’ll be using two brand-new soap molds with silicone liners. Earlier this week, I’d purchased the molds. They make around two-pound batches per mold. I’m looking forward to using them in some of my smaller batch ‘sample’ recipes. I have at least one sample soap that I’d like to try tomorrow and I’ll be sure to use one of those molds. I’m still unsure if I’m ‘sold’ on these molds. They definitely are cheaply made compared to my other handcrated wooden soap molds and while my other soap molds cost a bit more, I do believe I’ll stick with those when it comes to purchasing more molds, or… make them myself. I’ll be sure to purchase the molds in plenty of time, so I’m not needing them ASAP, which is why I ordered the above and since I purchased them on Amazon (and am an Amazon Prime member) I received them the same day that they were purchased. With my custom molds, the delivery time typically takes a bit longer since they are usually made after purchase and I’m fine with that.

Currently, I’m researching Aleppo soap (100% olive oil) and pine tar soap. While both soaps have been around for years, Aleppo soap easily trounces pine tar soap with its long history dating back over two thousand years. I won’t be making either of those soaps tomorrow. Both soaps are reportedly excellent for general dermatitis like eczema, psoriasis, bacterial dermatitis, acne, herpes, rosacea, and a few other skin conditions and while these really haven’t affected me, I’m still curious and will test a few recipes for both soaps and give them out as samples to a few acquaintances who do suffer from these issues. An interesting fact is that soaps were mainly created for the cloth industry to prepare wool for dyeing and not for personal hygiene.


Resources:

The History of Soapmaking
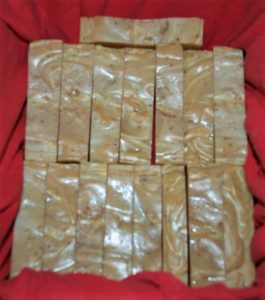
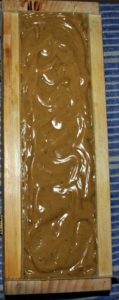
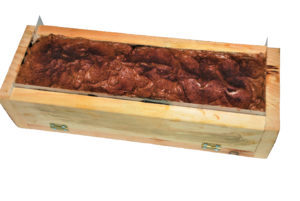
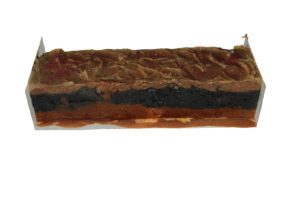
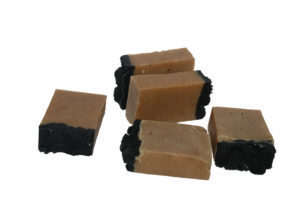
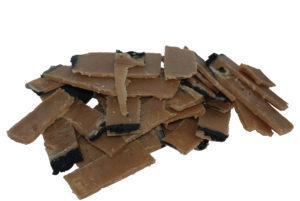
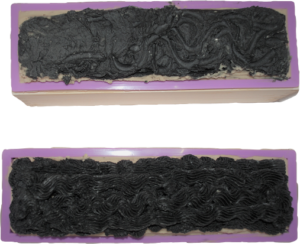
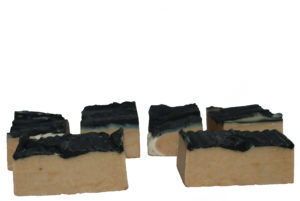
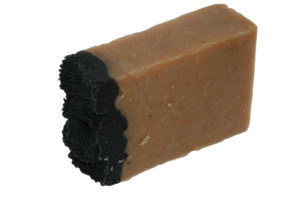
Continue Reading

Cold Processed Soap: Keeping it simple

Last weekend,


I invited a friend over to the house and showed them how to make cold processed soap. They left my home with two silicone soap molds full of raw soap and… my first soap cutter! Now if they want to continue making soap, they have two soap molds and a soap cutter. I did have another soap mold on hand in case those two molds couldn’t hold all of the soap batter and I was able to fill my smallest soap mold to the halfway mark. It gave me six bars of soap.

The soap was ready to release from its mold in less than 24 hours. This soap did have some soap ash on it and I might remove it at some point, but most likely not since these will be kept at home. Within the next few days, I’ll be making a large batch of cold processed soap. My 14-year-old daughter will be helping me create this soap. I’m still unsure of what ingredients will go into the soap, but I do know that at least two of the ingredients will have coconut oil and castor oil.

When it comes to soapmaking, typically the list of ingredients that I use for each soap recipe is small. I find that even with such a small list, that the soap usually does what it’s supposed to do. It cleans, conditions some have more bubbles/lather than others, but that’s by choice. For myself, knowing what each ingredient does and how they work well together is much better than trying a variety of ingredients that I’m unsure of how they’ll work when combined with each other. Typically, I let my soap cure for at least two months before I give it to others. Recently, the cure time has been much longer. I think it’s been about four months for the last large batch of soap that I’ve made, and I must say that I’m really enjoying the longer cure time since it’s given me a much harder and drier bar of soap.


Continue Reading

Soap Molds: Wooden and Silicone soap molds

I really love this soap mold that I featured above. It’s the largest one that I have thus far and I’m quickly outgrowing that. Several years ago, I used whatever resembled the shape of soap. I was quite fond of empty shoeboxes, Tupperware containers, bread pans and although I’d been telling myself for years that I’d purchase a few molds I didn’t until recently. Crazy, right? Currently, I have four soap molds; Two wooden and two silicone and I know before long I’ll be ordering more.

Both of my wooden molds are breakaway molds. They have held my attention for a while and I’m thankful that I finally went ahead and purchased them. It does seem that it would help in removing (potentially stubborn soap loaves) much easier. but I haven’t experienced that issue, yet.

Below, I’ve included a video in an easy way to line your wooden soap molds. I’ve been using parchment paper, but throwing away the paper bothers me and so I’m going to try mylar sheets. I should be receiving my sheets any day now. I’ll definitely post my findings what’s I use them.

Update…
I’ve found a better way to line my soap molds and it’s environmentally friendly since I’m reusing the liners. I’m using mylar sheets to line my soap molds! I’ve cut the sheets to fit the appropriate soap mold. After the soap has been removed from the mold to dry, I just rinse off the mylar sheets, dry, place in the appropriate soap mold for storage until the next use.

Continue Reading